

About six weeks ago, I made a trip to Goodwill. I didn’t have anything in particular that I was looking for, but I went down every aisle to see what I could find.
I ended up finding several things for my apartment, including a medium-sized tray.
It was only $3, sturdy, and the perfect size for a pitcher and drinks 🙂 But, it was made of pretty worn-down wood and needed some TLC.
After buying it, I scoured Pinterest for ideas. I saw several options but was pretty quickly sold on painting it a lighter color (it was originally a walnut color) and putting mosaic tiles in the bottom.
I will say that I’m someone who gets really impatient with DIY projects. So, although the mosaic tile trays look really cool, using the grout and getting the tiles spaced perfectly was intimidating.
But, I still wanted to try and go for it.
So, I went to Michael’s for supplies. I already had sandpaper (I needed to lightly sand the tray before painting it). But, I needed paint, tiles, glue, and grout.

Everything I needed was at Michael’s, plus a grout kit that had some sponges and wooden sticks to help with setting.
I started by sanding the tray, wiping it clean, and painting it. I was painting it a pearly white, so it took several coats before it looked the way I wanted it to. I let it dry overnight.

Then, I used the glass glue (which was clear) to glue the tiles to the bottom of the tray. I used toothpicks to space all of the tiles evenly.
I let those dry overnight as well, just to be on the safe side.
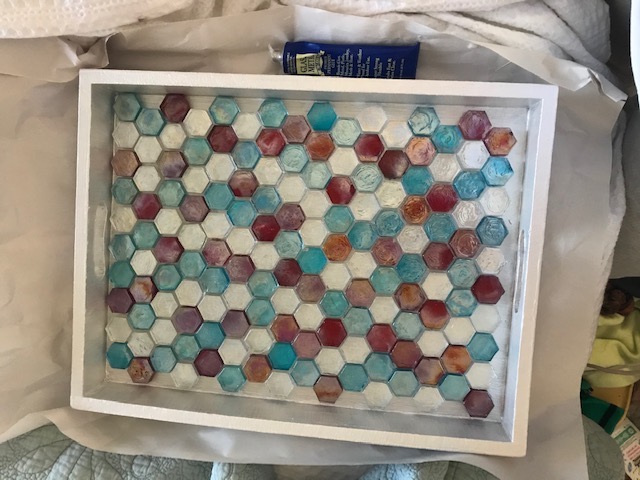
Finally, I put on the grout. I ended up having to do two layers of it because the first layer settled down and cracked some. The second layer looked much better!
Once the grout was fully dry, I scraped off some of the extra grout and cleaned it up.

Of course, this sounds a lot easier than it was to do! I had to really keep my cool setting the tiles — since I used a different shape of tile — it was probably a bit more complicated than using square or rectangle tiles.
But, I put on a TV show (hours of red carpet footage from the Grammy’s) and just kept at it.
In the end, the tray looks so much better and cooler than it did when I bought it, and I love it!
I will say, this is not a “money-saving DIY.” The $3 tray turned more like $65 tray, but of course, if I had purchased it with the tile in it, it definitely would’ve been more expensive 🙂
I actually couldn’t decide between two sets of tiles, so I used the other tiles I bought on a second tray! It was a tray I almost threw out because kitty Blanche really ripped up the leather interior.
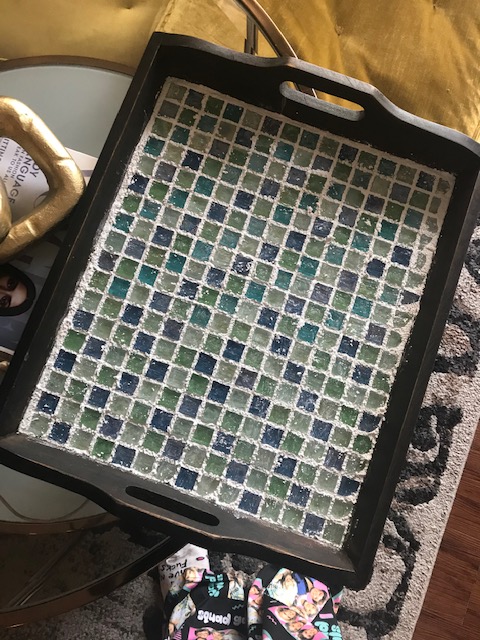
But, the tiles saved the day… and using square tiles was much, much easier.
I love the way both of these trays turned out!
Have you ever done anything like this?
To see more writing from me, be sure to subscribe to The Bitter Lemon by clicking “subscribe” on the right side of your screen. Want even more? Subscribe to my newsletter to get roundups, book recs and lifestyle tips.
