
Happy Valentine’s Day!
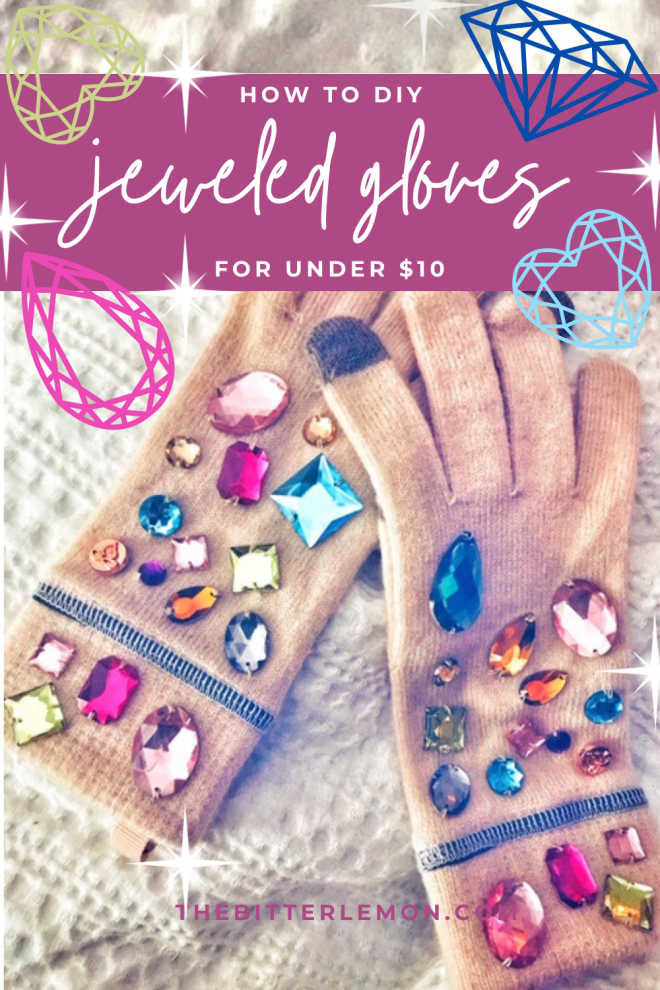
It is just a standard Monday over here, but I have been working on a little DIY for a few weeks that I’m excited to finally share: jeweled gloves!
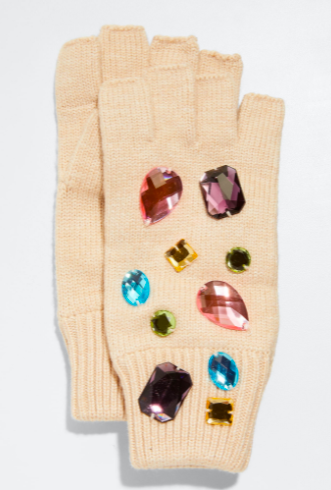
In December, I saw a pair of jeweled fingerless gloves in a magazine. They were Lele Sadoughi, very cute, and also $95.
Now, I am not someone that automatically turns away at a higher price point. There are things I’ve purchased that have been worth the splurge and I’ve never looked back.
But $95 for gloves that I might wear 5 times? I mean Texas has its chilly days, but not for $95 fingerless gloves.
I decided I could recreate a similar pair myself, for much (MUCH) less money.
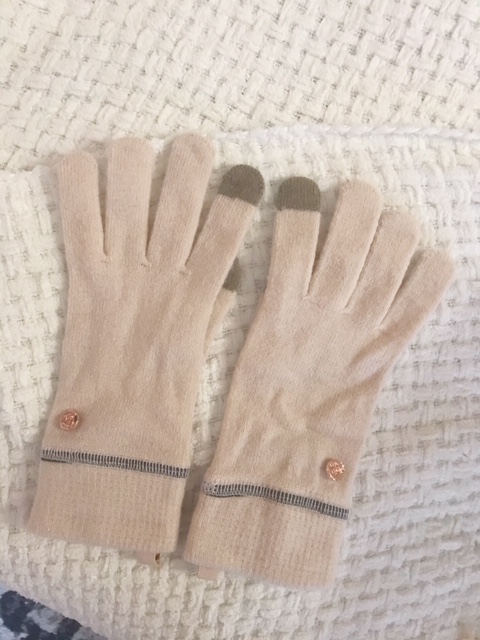
At first, I looked on ThredUp for a pair of ivory fingerless gloves. I did find a few cute pairs, but I realized I should just check my coat closet and see if I had anything I could use already.
I quickly found a set of dusty pink gloves with screen-friendly fingertips. Sure, I could cut them for the fingerless look, but I’m not sure how it wouldn’t end up raggedy looking.
So, $0 for gloves, but if you’re starting with nothing, you can get a cute plain pair for $5 or less. Check thrift stores, Goodwill, and Walmart.

Next, I searched online for gems. The ones on the high-end pair were mixed in color and shape, which I liked.
I found a bag of mixed jewels at Jo-Ann Fabrics for under $5 (these are the exact ones) and I had a 20% off coupon, making them less than $4. Shipping was $8, so I chose curbside pickup for $0.
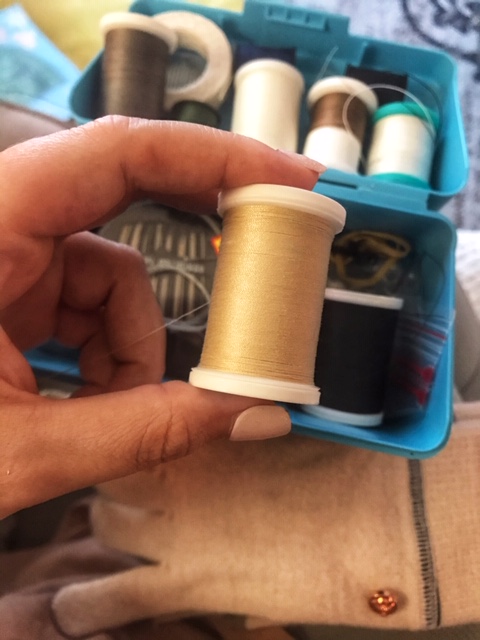
The only other thing I would need is a needle and thread, which I already had, so… $0.
I started by sorting the gems and deciding which ones I was going to use. Then, I placed them on the gloves. Since the gems were mixed, the gloves weren’t going to look identical (plus, that’s too much pressure), but I could coordinate them enough.
Now’s probably a great time to inform you all that I am not a seamstress. I can barely replace a button, let alone make anything decent. But, I figured this project would be simple enough, even for me.
At first, I pinned down the gems to hold them in place. But, once I started to sew the first one on, I quickly realized that it was NOT the way to go.

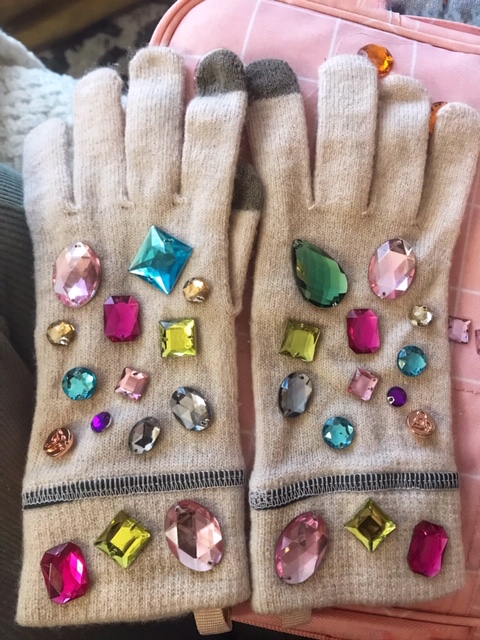
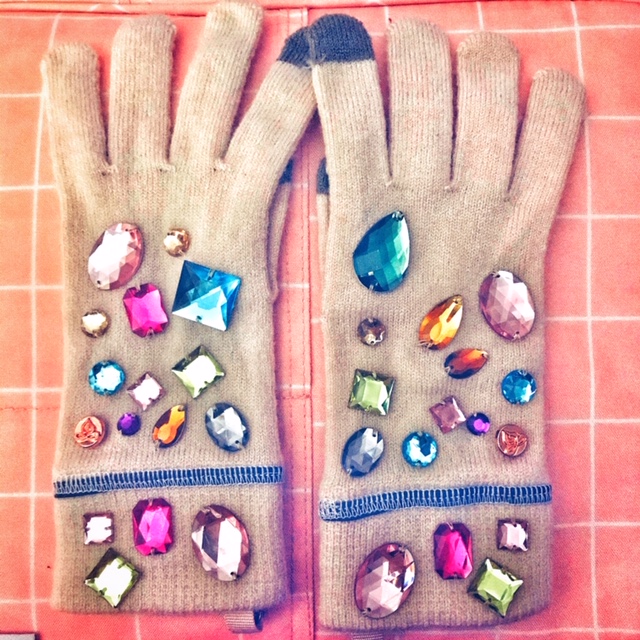
Instead, I took pictures of my jewel “layout” and just sewed each one on right after holding it in place.
This project was quite a bit more difficult than I anticipated — which is probably why the actual pair I was trying to replicate was nearly $100 — because you don’t want to sew the glove shut!
It’s tough to get your hand into the glove to reach the jewels near the fingers… which is another reason why the fingerless option may be easier.
But hey, I did this while I watched football, and even though my team lost, I ended up with sparkly gloves!
When I finished the first one, I didn’t LOVE it like I thought I would. Was it too much? Was it tacky? But, I decided to keep going, figuring that once I put them on with my coat, scarf, and beanie, it would be fun and cute.
And you know what? They are so cute, and fun, and I’m all about adding some sparkle where I can. Plus, they were $4!
If you like this idea, but want to go rogue, it would be cute to use all the same color gems, such as all red gems on a black pair of gloves. You could put just one large gem in the center, or maybe small gems on the knuckles or fingernails!
Sewing gems on a beanie or a ski band would also be cute… and much easier 🙂
What do you think?!
To see more writing from me, be sure to subscribe to The Bitter Lemon by clicking “subscribe” on the right side of your screen. Want even more? Subscribe to my newsletter to get roundups, book recs and lifestyle tips.
